
Tools
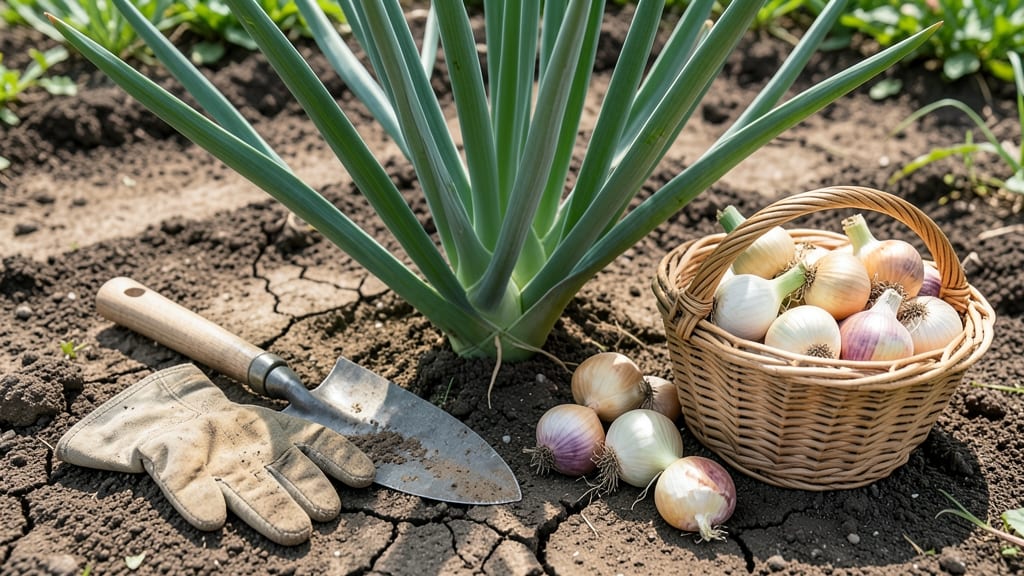
Pulling onions from the garden at the right time means the difference between a perfect harvest and a wasted crop — and the signs of maturity are easier to spot than you think.
Picture this: you’ve nurtured your 🧅 plants all season, only to yank them too soon and end up with puny bulbs, or wait too long and watch them shrivel in the soil.
Knowing when to pull onions isn’t just about timing; it’s about reading the plant’s cues before the weather or pests ruin your hard work.
Most gardeners in Zone 6a should start checking for readiness in late spring, when the tops yellow and flop over like a bowing dancer. But the real secret? It’s not just the color — it’s the bulb size, the skin’s texture, and even how easily they slide from the soil.
Miss these clues, and you’ll either store onions that spoil fast or lose flavor before they even make it to the kitchen.
In this guide, I’ll walk you through the 5 foolproof signs your onions are ready, how to test them before pulling, and the one mistake that turns great onions into sad, shriveled leftovers. No guesswork — just a perfect harvest every time.
5 Visual signs your onions are ready for harvest (with timing guide)
Harvesting onions at the right moment transforms your garden from a patch of green foliage into a treasure trove of flavorful bulbs. Timing is everything—pull them too soon, and you’ll end up with tiny, pungent green onions that bolt quickly.
Wait too long, and your storage onions become soft, sprouting messes instead of long-lasting staples.
I’ve learned the hard way that visual cues are far more reliable than guessing by days since planting. The perfect onion for storage has a dry, papery neck and a bulb that feels firm to the touch.
But how do you know when your onions hit that sweet spot? Let’s break down the five unmistakable signs your onions are begging to be harvested.
- 🌱 1. Tops Yellow and Flop Over
The green tops turn straw-colored and collapse toward the ground. This signals the bulb has stopped growing upward and is now maturing. - 🧅 2. Bulb Reaches 1-2 Inches in Diameter
Gently brush away soil to check for a firm, round bulb. Storage onions should be at least golf-ball sized (1-2 inches). - 💧 3. Neck Begins to Dry and Shrink
The stem connecting bulb to top (the neck) tightens and dries out. This is nature’s way of sealing the bulb for storage. - ✂️ 4. Skin Turns Papery and Separates Easily
The outer layers should peel back like onion paper. If it’s still moist or sticks together, wait a few days. - 🌡️ 5. Daytime Temps Drop Below 80°F
Onions mature best in cooler weather. Aim to harvest when nighttime temps dip into the 60s°F for optimal flavor and storage life.
If you’re growing green onions (scallions) instead of storage onions, the rules change slightly. Harvest them when the greens reach 6-8 inches tall—you can snip them back repeatedly, and they’ll keep regrowing. But for storage onions, those numbered signs above are your golden ticket to a successful harvest.
Timing also depends on your climate zone. In cool climates (Zones 3-5), aim for a late spring harvest (May-June). Gardeners in warmer zones (6-10) should plan for fall harvests (September-October) to avoid the heat.
I’ve had the best luck harvesting in the morning after dew dries—the bulbs stay cleaner and cure more evenly.
Pro tip: Don’t dig up every onion at once. Spread out your harvest over 1-2 weeks to avoid overwhelming your storage space. Use a garden fork to loosen soil gently around the bulb before pulling—this prevents damage to the skin.
Once you’ve pulled your onions, curing is critical. Lay them in a shady, dry spot (like a garage or porch) for 1-2 weeks to toughen the skins. This step prevents rot and extends storage life to 6-8 months in a cool, dark place.
Remember, over-mature onions (with sprouting tops or soft centers) won’t store well. If you miss the window, use them fresh in recipes like caramelized onions or pickled onions—just don’t waste them! With these visual cues and timing tips, you’ll go from guessing to mastering your onion harvest every season.
Now grab your gloves and get ready to pull those perfect bulbs—your kitchen (and your garden) will thank you! 🧅
How to test onion maturity before pulling: the 3 critical checks
Before you dig up a single onion, you need to confirm it’s truly ready—or risk ending up with bulbs that won’t store or flavor like store-bought. The key is testing three simple but critical factors: the neck snap test, bulb firmness, and leaf color.
Skipping these checks means guessing, and guesswork leads to wasted harvests.
I’ve pulled onions too early, only to watch them rot in my pantry, and too late, leaving me with shriveled, flavorless relics. The difference between a perfect harvest and a disappointment comes down to these three tests. Let’s break them down so you never second-guess again.
Pulling Onions: Pros & Cons
Pros of Pulling Now
- ✅ Optimal flavor: Sweet, pungent taste at peak maturity
- ✅ Longer storage life: Dry skins prevent spoilage for months
- ✅ Firm texture: Bulbs resist bruising during harvest
- ✅ Easy curing: Papery skins dry quickly in sunlight
Cons of Pulling Now
- ❌ Risk of bolting: If pulled too early, tops may flower next year
- ❌ Small bulbs: Underdeveloped onions won’t store well
- ❌ Moisture retention: Soft skins spoil faster in storage
Pros of Waiting Longer
- ✅ Larger bulbs: Maximum size potential (up to 2 inches)
- ✅ Drier skins: Better natural preservation
Cons of Waiting Longer
- ❌ Over-maturity: Bulbs split or rot in soil
- ❌ Loss of flavor: Starchy, bland taste develops
- ❌ Shriveling: Skins crack, inviting pests and disease
- ❌ Storage failure: Moisture loss makes them unusable
Best time to pull: When 2-3 leaves remain, tops yellow, and bulbs pass all three tests below.
The neck snap test is my go-to method because it’s foolproof. Gently grasp the onion’s top 2 inches and bend it sideways—if the neck snaps cleanly with a slight crack, it’s ready.
If it bends without breaking, wait 3-5 days. This test tells you whether the bulb has fully redirected nutrients from the leaves to the root.
Next, check bulb firmness by pressing your thumb into the soil near the base. A mature onion will feel rock-hard and resist pressure, while an immature one will give slightly.
Dig one up to confirm: the bulb should be 1-2 inches wide and covered in a dry, papery skin. If it’s smaller or still moist, it needs more time.
Finally, examine the leaf color. Ready onions have yellowing tops that flop over like a bowing dancer, leaving only 2-3 green leaves. If the tops are still upright and green, they’re not mature enough.
Over-mature onions, however, will have completely browned, crispy leaves—a sign they’ve passed their prime and may split or rot.
Waiting too long after these signs appear ruins storage quality and flavor. Over-mature onions develop a starchy, bland taste and skins that crack easily, inviting rot. I’ve learned the hard way: once the tops turn crispy and brown, the clock is ticking.
Pull them within 2-3 days or risk losing your entire harvest.
Pro tip: Test a few onions from different parts of your bed—they may mature at slightly different times. Once you’ve confirmed readiness with all three checks, harvest on a dry, sunny morning for the best results. Your pantry (and taste buds) will thank you.