
How To
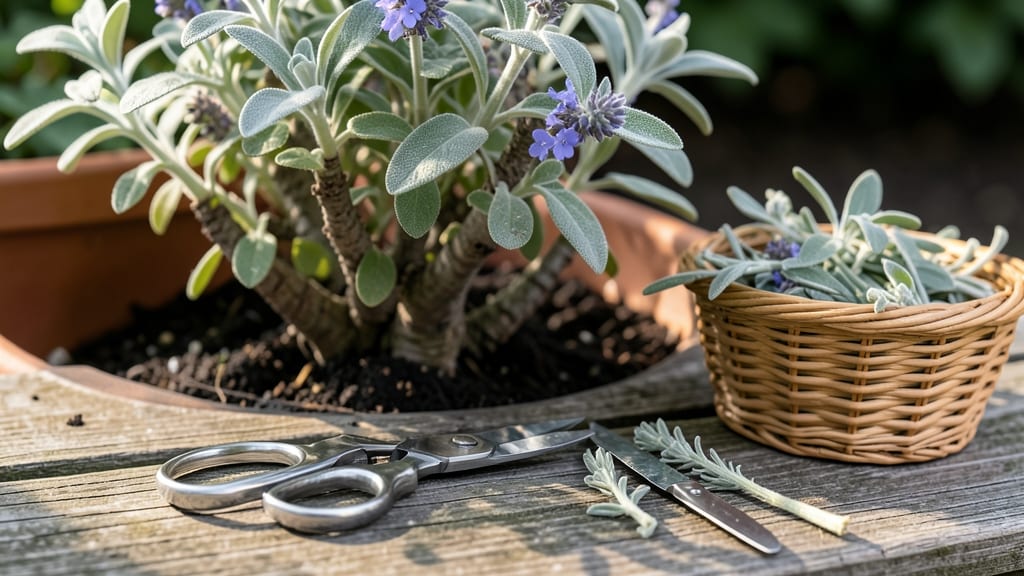
To harvest garden sage at its peak flavor and aroma, start by cutting just before flowering for the best results 🌿 — this is when the leaves turn silvery and pack the most punch.
Did you know your garden sage leaves can turn silvery when harvested at the right time—and that this simple trick boosts flavor and extends shelf life? Mastering the perfect harvest timing and techniques ensures you get the most aromatic, vibrant sage for cooking and preservation.
Harvesting sage correctly isn’t just about timing—it’s also about knowing how to cut without harming the plant. A sharp pair of pruning shears or clean scissors will give you clean cuts, and harvesting in the morning ensures the leaves are at their freshest and most fragrant.
Once you’ve mastered the harvest, you’ll discover how to dry and store your sage to maintain its vibrant color and robust flavor. Whether you’re air-drying bundles or using an oven for quick preservation, these methods will keep your sage ready for recipes all year long.


When and how to harvest sage leaves for maximum flavor and silvering
Harvesting garden sage at the right time transforms its leaves into fragrant, silvery treasures perfect for cooking and preservation. The key is timing—harvest just before flowering when the leaves are fully mature but haven't yet lost their vibrant aroma.
This is when you'll notice those prized silvery leaves, a sign of peak flavor and oil concentration. If you wait too long, the leaves become woody and bitter, ruining their culinary potential.
Sage thrives in USDA Zone 6a and beyond, with the ideal harvest window falling between late summer and early fall. My garden sage plants typically reach harvest readiness around 120 days after planting, just as they begin to show flower buds.
This timing ensures the leaves retain their aromatic oils, which are most potent before the plant diverts energy to flowering. Pro tip: Harvest on a dry morning after dew has evaporated for cleaner cuts and faster drying.
Before you begin, gather your tools: a pair of sharp pruning shears or clean scissors, a bowl for collecting leaves, and a small spray bottle of water for rinsing. Avoid using dull tools, as they crush stems and release bitter compounds.
The goal is to make clean cuts that encourage new growth while preserving the plant's health. Now, let's dive into the step-by-step process to harvest your sage like a pro.
How to Harvest Sage for Maximum Flavor
-
Step 1: Identify Mature Leaves
Look for fully developed leaves that are 1-2 inches long and have a silvery-gray hue. These leaves are ready for harvest and packed with flavor. -
Step 2: Choose the Right Stems
Select non-flowering stems that are at least 6 inches tall. Avoid cutting into the woody center of the plant, as this can harm its growth. -
Step 3: Make Clean Cuts
Using sterilized pruning shears, cut stems at a 45-degree angle, about 1/4 inch above a leaf node. This encourages new growth and prevents disease. -
Step 4: Harvest Strategically
Never take more than 1/3 of the plant at once. Focus on the outer stems first to maintain the plant's shape and encourage bushier growth. -
Step 5: Rinse and Dry
Gently rinse leaves with cool water to remove dirt, then pat dry with a clean towel. Avoid soaking, as excess moisture can dilute the aromatic oils. -
Step 6: Bundle for Drying
Tie stems into small bundles with twine and hang upside down in a well-ventilated, dark place for 1-2 weeks. This preserves the silvery color and intensifies the flavor.
One of the most rewarding aspects of harvesting sage is watching the leaves develop their silvery hue as they dry. This color change isn't just visually striking—it’s a natural indicator that the volatile oils responsible for sage's signature aroma are becoming more concentrated.
For the best results, store dried sage in an airtight container away from direct sunlight. When stored properly, your harvest can retain its flavor for up to 1 year, making it a cost-effective way to enjoy homegrown herbs year-round.
If you're harvesting sage for fresh use, there's no need to dry the leaves. Simply pluck individual leaves as needed and use them within 5-7 days for the best flavor. Fresh sage leaves are ideal for grilling meats, infusing oils, or adding to salads.
The silvery leaves, however, are often preferred for drying because their higher oil content makes them more potent and long-lasting.
After harvesting, give your sage plant a little TLC to encourage regrowth. Water it deeply but infrequently to prevent root rot, and feed it with a balanced fertilizer (like 5-10-10) every 4-6 weeks during the growing season.
Prune any dead or yellowing leaves to keep the plant healthy and promote new growth. With proper care, your sage plant can produce multiple harvests per season, ensuring you always have fresh, flavorful leaves on hand.
Harvesting sage is more than just a gardening task—it's an art that connects you to the plant's natural rhythms. By paying attention to the seasonal timing, leaf maturity, and proper techniques, you'll unlock the full potential of your garden sage.
Whether you're drying leaves for winter cooking or using them fresh, the reward is a richer flavor and a deeper appreciation for this versatile herb. Happy harvesting!
🌿
Best practices for drying and storing harvested sage to maintain freshness
Once you've harvested your sage leaves at the perfect silvery stage, proper drying and storage are key to preserving that bold flavor and vibrant color. Sage's aromatic oils degrade quickly when exposed to heat or moisture, so choosing the right method makes all the difference.
Whether you're a beginner gardener or a seasoned herb enthusiast, these techniques will help you avoid common pitfalls like mold or flavor loss.
Your drying method—whether air-drying or oven-drying—will impact how well your sage retains its potency. Air-drying is the traditional, low-tech approach that mimics natural conditions, while oven-drying offers faster results but requires careful temperature control. Both methods have their place, depending on your time constraints and available space.
Let's break down the best practices for each, plus how to store your dried sage so it stays fresh for up to 12 months.
| Method | Time Required | Best For | Equipment Needed | Flavor Retention |
|---|---|---|---|---|
| Air-Drying | 2-4 weeks | Large batches, traditionalists | Hanging bundles, paper bags | Excellent (90%) |
| Oven-Drying | 1-3 hours | Small batches, quick results | Baking sheets, low oven | Good (80-85%) |
For air-drying, bundle your sage stems together and hang them upside down in a well-ventilated, dark place like a pantry or closet. Avoid direct sunlight, which can fade the leaves and degrade their volatile oils.
Once completely dry—when the leaves crumble easily—strip them from the stems and store in an airtight container. This method preserves the most flavor but requires patience; rushing can lead to mold or uneven drying.
If you're short on time, oven-drying is a great alternative. Preheat your oven to 200°F (93°C)—never higher—to prevent burning the leaves. Spread them out on a baking sheet lined with parchment paper and prop the oven door open slightly with a wooden spoon to allow moisture to escape.
Check frequently to avoid over-drying, which turns leaves brittle and less aromatic. This method works best for small batches and is ideal when you need sage quickly for recipes.
Proper storage conditions are just as critical as drying. Store your dried sage in a cool, dark place—like a glass jar or sealed container—away from moisturedirect light. Humidity is the enemy of dried herbs; even a tiny amount can cause mold or mildew.
For extra protection, add a silica gel packet to your storage container. Label your container with the harvest date to track freshness, as sage loses potency over time.
With the right care, your dried sage can stay flavorful for up to 12 months, though it's best used within 6 months for peak aroma.
If you notice white fuzz or a musty smell, your sage has mold—discard it immediately. This usually happens when storage conditions are too humid or air isn't circulating properly. To prevent this, always use clean, dry containers and avoid overcrowding the leaves.
For small spaces, consider using vacuum-sealed bags or even ice cube trays for single-serving portions. With these tips, you'll keep your sage fresh and ready for all your gardening and culinary projects all year round.